|
|
首先说明,Widget是一种很小的应用程序。在Android1.5中加入了AppWidget framework框架之后,开发者可以使用该框架开发Widget。Widget可以拖到用户的桌面并且可以交互,它提供一个full-featured apps预览,可以在桌面指定一个空间来显示应用提供的自定义内容。
每个Widget就是一个BroadcastReceiver,它们用XNL metadata 来描述WIdget细节。AppWidget framework通过Broadcast intents 和 Widget通信,Widget更新使用RemotesViews来发送。RemotesViews被包装成一个layout和特定的内容来显示到桌面上。下面就以我从网上找的一个桌面拨号的小例子来说明一下开发Widget的具体步骤。
先来看一下整个程序的结构:
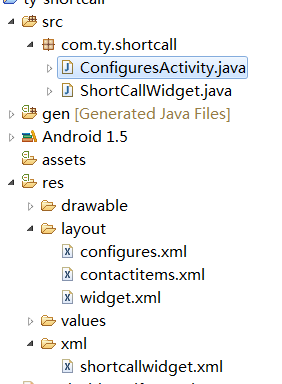
具体步骤如下:
1.首先需要在res\layout目录下创建桌面组件的布局文件widget.xml- <? xml version = "1.0" encoding = "utf-8" ?>
- < LinearLayout xmlns:android = "http://schemas.android.com/apk/res/android"
- android:layout_width = "wrap_content" android:layout_height = "wrap_content"
- android:orientation = "vertical" android:id = "@+id/widLinear"
- android:focusable = "true" android:focusableInTouchMode = "true"
- android:clickable = "true" android:clipChildren = "true"
- android:background = "@drawable/shortcallbg" >
- < ImageView android:layout_width = "wrap_content"
- android:layout_height = "wrap_content" android:id = "@+id/widImageCall"
- android:layout_gravity = "center" android:layout_marginTop = "8dip"
- android:background = "@drawable/callbtn" android:focusable = "true"
- android:clickable = "true" > </ ImageView >
- < TextView android:layout_width = "wrap_content"
- android:layout_height = "wrap_content" android:singleLine = "false"
- android:id = "@+id/widNameText" android:layout_gravity = "center"
- android:width = "70dip" android:gravity = "center"
- android:textColor = "@color/fontColor" > </ TextView >
- </ LinearLayout >
|
2.在res\xml目录下创建一个描述这个桌面组件属性的文件shortcallwidget.xml,
- <? xml version = "1.0" encoding = "utf-8" ?>
- < appwidget-provider
- xmlns:android = "http://schemas.android.com/apk/res/android"
- android:initialLayout = "@layout/widget"
- android:minWidth = "72dip" android:minHeight = "72dip"
- android:updatePeriodMillis = "0"
- android:configure = "com.ty.shortcall.ConfiguresActivity" >
- </ appwidget-provider >
|
其中 android:updatePeriodMillis = "0" 是指自动更新的时间间隔。 android:configure 这个属性是可选的。如果你的Widget需要在启动前先启动一个Activity.则需要设定该项为你的Activity
3.创建一个类ShortCallWidget,让它继承AppWidgetProvider.AppwidgetProvider中有许多方法,如OnUpdate(周期更新时调用),OnDelete(删除组件时调用),OnEnabled(当第一个组件时调用),开发者可以根据自己的需要重写这些方法。
- public void onUpdate(Context context, AppWidgetManager appWidgetManager,
- int [] appWidgetIds) {
- // TODO Auto-generated method stub
- super .onUpdate(context, appWidgetManager, appWidgetIds);
- Log.d(TAG, "login the widget" );
- int count = appWidgetIds.length;
- for ( int i = 0 ; i < count; i++){
- int widgetId = appWidgetIds[i];
- updateAppWidget(context, appWidgetManager, widgetId);
- }
- }
|
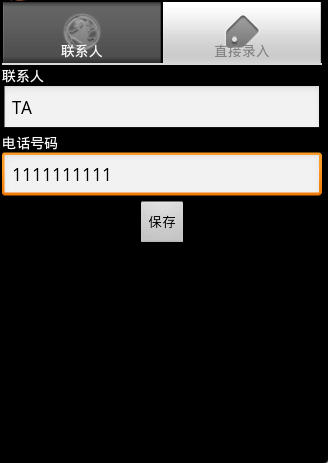
4.处理 android:configure指定的类,在类中监听保存的button,当点击按钮后,创建一个AppWidgetManager的实例,然后通过调用之前的.updateAppWidget方法更新Widget。
5.最后别忘了,在AndroidMainfest.xml中注册相应的类ShortCallWidget以及ConfiguresActivity。
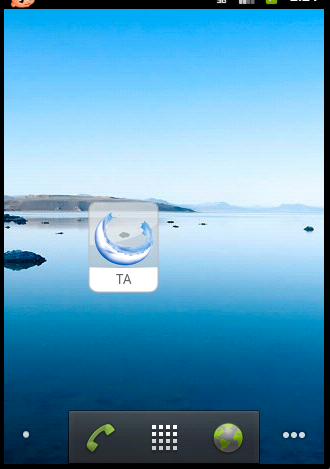
效果图:
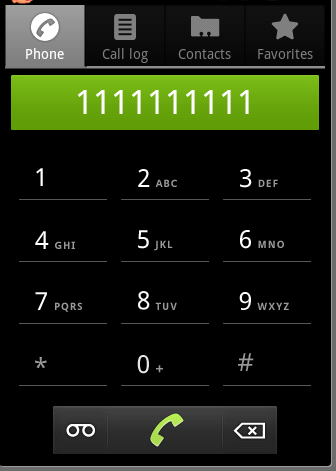
点击之后的效果:
----------------------------
原文链接:https://blog.51cto.com/hddev/634276
程序猿的技术大观园:www.javathinker.net
[这个贴子最后由 flybird 在 2020-06-04 08:24:31 重新编辑]
|
|

